
Building Simple Circuits: A Parent’s Guide to Teaching Electronics Safely
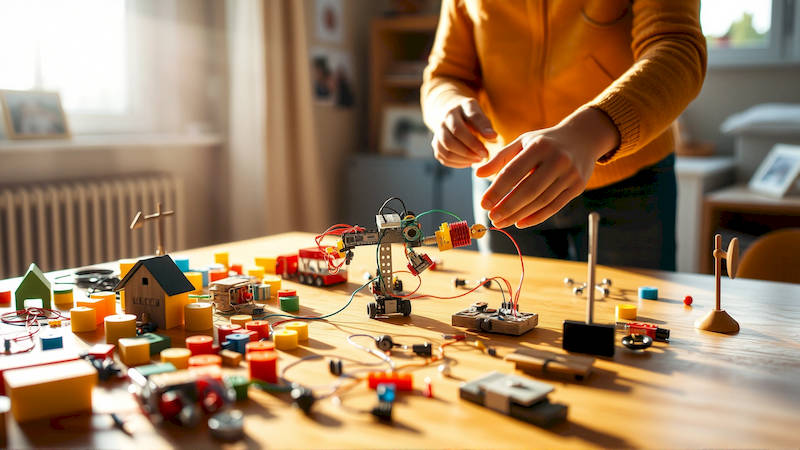
The world is increasingly powered by technology, and understanding the basics of electronics is becoming less of a specialist skill and more of a fundamental literacy. Introducing children to the concepts behind how things work not only sparks curiosity and fosters problem-solving skills, but also prepares them for future academic and professional pursuits in STEM fields. This isn’t about creating the next generation of electrical engineers overnight; it’s about demystifying technology and empowering kids to become creators, not just consumers. Providing early exposure to electronics can significantly impact a child's aptitude and interest in related areas later in life.
Many parents feel intimidated by the idea of teaching electronics, imagining complex diagrams and potentially dangerous experiments. However, introducing basic circuitry can be surprisingly simple and safe, utilizing readily available kits and household items. This guide aims to equip parents with the knowledge and confidence to guide their children through their first foray into the world of circuits, emphasizing safety, learning through play, and building a solid foundational understanding. We will focus on understanding the core components, building basic circuits, and importantly, how to approach this learning experience responsibly.
- Understanding the Core Components of a Simple Circuit
- Safety First: Establishing Ground Rules for Electronics Exploration
- Building a Basic Circuit: A Step-by-Step Guide
- Expanding the Circuit: Adding Switches and Motors
- Troubleshooting Common Circuit Problems and Fostering Problem-Solving
- Resources for Continued Learning and Exploration
- Conclusion: Empowering the Next Generation of Innovators
Understanding the Core Components of a Simple Circuit
At its most basic, a circuit is a pathway for electricity to flow. This pathway needs three fundamental components: a power source (like a battery), a conductive path (typically wires), and a load (something that uses the electricity, like a light bulb or motor). Without all three, the circuit won't work. Think of it like a water system; the battery is the pump, the wires are the pipes, and the light bulb is a water wheel that turns when the water flows. Explaining these analogies to children can help cement the abstract concepts in a relatable way. It’s also important to introduce the idea of ‘open’ and ‘closed’ circuits, illustrating that a complete, unbroken path is necessary for electricity to flow.
Many beginner kits utilize breadboards, which are plastic boards with holes that allow for easy circuit building without soldering. This is a crucial safety feature for children, as soldering involves high temperatures and potentially hazardous fumes. Explain that the breadboard is a convenient way to experiment and test how components work together. Furthermore, introduce the concept of polarity – the positive (+) and negative (-) sides of a battery. Demonstrate that connecting the positive and negative terminals correctly is crucial for the circuit to function. Misconnecting them won't necessarily damage most basic components, but it will prevent the circuit from working, offering a valuable learning opportunity about proper connections.
Finally, it's worth noting the concept of resistance. While often simplified for initial lessons, explaining that different materials impede the flow of electricity to varying degrees can lay the foundation for understanding more complex concepts later. A simple demonstration can involve testing the conductivity of different materials (plastic, wood, metal) to show which allow electricity to flow easily and which don't. Focus on the observable results – does the light bulb light up? – to bring the concept to life.
Safety First: Establishing Ground Rules for Electronics Exploration
Safety is paramount when introducing children to electronics. The voltages used in beginner kits are generally low and relatively safe, but it’s crucial to establish clear rules and supervision. Never allow children to work with mains electricity (wall outlets) under any circumstances. Battery-powered circuits are the sole focus for beginners. Stress the importance of never directly connecting a battery to another battery; this can cause overheating and potential hazards. Similarly, explain the importance of respecting the components themselves—avoid bending wires excessively or forcing connections.
Supervision should be constant, particularly for younger children. Even with safe components, accidental short circuits (where electricity flows directly from the positive to the negative terminal without going through a resistance) can occur, potentially overheating the battery. Regularly check battery temperature during use, especially with prolonged experimentation. It's also beneficial to create a dedicated workspace, free from distractions and potential hazards like water or flammable materials. A well-lit, organized space enhances learning and minimises accidents.
Furthermore, discuss the concept of responsible experimentation. Encourage children to think through the potential consequences of their actions before making connections. "What do you think will happen if we connect this here?" is a valuable question to prompt critical thinking. Remind them to always ask for help if they're unsure about something or encounter an unexpected result. By fostering a safety-conscious approach, you’ll instill valuable habits that will serve them well throughout their STEM journey.
Building a Basic Circuit: A Step-by-Step Guide
Let's move onto creating a super simple circuit: powering an LED. You'll need a battery (typically 9V for beginner kits, though lower voltages are also suitable), a battery connector, an LED (Light Emitting Diode), and some connecting wires or a breadboard. The first step involves connecting the battery connector to the battery, paying close attention to the polarity. Next, insert the LED into the breadboard (or connect it directly using wires). LEDs have a positive (anode – longer leg) and a negative (cathode – shorter leg).
Connect the positive side of the battery connector to the positive leg of the LED, and the negative side of the battery connector to the negative leg of the LED. If the LED doesn’t light up, try reversing the connections. LEDs are polarity-sensitive, meaning they only work when connected in the correct orientation. This troubleshooting process is a fantastic learning opportunity—it demonstrates the importance of attention to detail and systematic problem-solving. “Okay, it didn’t work the first time. What can we try changing?” is a great prompt.
Once the LED lights up, you've successfully built a basic circuit! You can then experiment with different colors of LEDs, observing how the brightness and color remain consistent. For older children, you can introduce a resistor in series with the LED. Explain that the resistor limits the current flowing through the LED, preventing it from burning out. Using a resistor is often considered best practice and reinforces understanding of electrical principles.
Expanding the Circuit: Adding Switches and Motors
Now that the foundational understanding is established, you can expand the circuit by adding components like switches and small motors. Adding a switch allows children to control the flow of electricity, creating a simple on-off mechanism. Break the circuit at any point (for example, between the battery and the LED) and insert a switch. When the switch is closed, the circuit is complete, and the LED lights up. When the switch is open, the circuit is broken, and the LED turns off. This is a concrete illustration of how circuits are controlled.
Introducing a small DC motor presents another exciting challenge. Be aware that motors typically require more current than LEDs, so you may need to use a stronger battery or power supply. Connect the motor in place of the LED, carefully observing the polarity. If the motor doesn’t spin, reverse the connections. You can then experiment with different types of switches (toggle switches, push-button switches) to control the motor’s operation.
This is a great opportunity to introduce the concept of energy conversion—electrical energy from the battery is being converted into mechanical energy, causing the motor to spin. Relate this to real-world examples: "Remember how a battery powers a toy car? It's the same principle!" This connection to everyday life makes the learning experience more meaningful and engaging.
Troubleshooting Common Circuit Problems and Fostering Problem-Solving
Inevitably, things will go wrong. Circuits won't always work as expected, and this is where valuable learning happens. Common problems include loose connections, incorrect component orientations, and depleted batteries. Instead of immediately fixing the problem for the child, guide them through the troubleshooting process. Start with the simplest checks: “Is the battery still good?” “Are the wires securely connected?”.
Then, encourage them to systematically examine the circuit, checking each component and connection. Explain the importance of identifying the symptoms of the problem—what is happening (or not happening) that indicates something is wrong? This is a crucial skill that extends far beyond electronics. A helpful strategy is to use the “divide and conquer” approach: break the circuit down into smaller sections and test each section individually.
For example, if the LED isn’t lighting up, test the battery and wires separately to ensure they are working correctly. This process fosters critical thinking, problem-solving skills, and a sense of accomplishment when the issue is finally resolved. Avoid simply providing the answer; instead, provide guiding questions and support to help the child discover the solution themselves. According to a study by the National Research Council, "Children learn more effectively when they are actively involved in the learning process, rather than passively receiving information."
Resources for Continued Learning and Exploration
There’s a wealth of resources available to support your child’s exploration of electronics. Starter kits from companies like Snap Circuits and littleBits provide pre-made components and clear instructions, making it easy to build a variety of circuits. Online platforms like Arduino and Raspberry Pi offer more advanced opportunities, but are best suited for older children with some prior experience. Khan Academy offers free online courses on electronics and electrical engineering.
Libraries and science museums often host workshops and events focused on STEM education. YouTube channels like GreatScott! and ElectroBOOM provide engaging and informative videos on electronics, but require careful monitoring due to content complexity and potential safety demonstrations best left to adults. Finally, consider joining a local robotics club or maker space, where children can collaborate with others who share their interests and learn from experienced mentors. Encouraging group learning is invaluable, fostering collaboration and peer mentorship.
Conclusion: Empowering the Next Generation of Innovators
Introducing children to the fundamentals of electronics is an investment in their future. It’s about more than just learning how circuits work; it's about fostering creativity, problem-solving skills, and a passion for STEM. By emphasizing safety, encouraging experimentation, and providing access to resources, you can empower your child to become a confident and capable innovator. Remember the core takeaway: start simple, focus on the fundamentals, and prioritize a hands-on, exploratory learning experience.
The key takeaways include a commitment to safety first, understanding the basic components (power source, path, load), encouraging systematic problem-solving, and providing opportunities for continued exploration. A practical next step is to purchase a beginner electronics kit and dedicate some regular time to building circuits together. It's also beneficial to connect learning to real-world applications, demonstrating how electronics impact their everyday lives. Ultimately, the goal is to ignite a lifelong curiosity and inspire the next generation of engineers, scientists, and creators.
Deja una respuesta